App of the Week: Out of Milk

Out of Milk, the popular shopping list app, just added support for Amazon’s Alexa and Google Assistant.


By Ryne Hager of Android Police

There are a lot of shopping list apps out there, and that’s an understatement. Back in the early days of app development, shopping lists were one of the most popular simple projects, and even now people learning the ropes typically toss one together. But Out of Milk has stood the test of time for the last seven years. And now managing your shopping list is getting just a bit more convenient via the new Out of Milk voice assistant, which works with both Amazon’s Alexa and Google’s Assistant.

There are a couple of steps you’ll have to make to get things working as they should. The full instructions for Google Home are here (and Alexa instructions are here), but remember that the Out of Milk voice assistant requires you to use an account created on the Out of Milk app or website. Once it’s set up you’ll be able to yell at your assistant of choice and make use of the following features:

• Add and remove items to a list (e.g. “Add rice to my list.”)
• Include the quantity of an item on a list (e.g. “Add two gallons of milk to my list.”)
• Add multiple items at once to a list ( “Add bananas, cereal, & butter to my list.”)
• Check which list their editing (e.g. “Which list am I in?”)
• Switch between existing lists (e.g. “Switch to my ‘Walmart’ list.”)
• Read off items on a list (e.g. “What is on my current list?”)
• Read off all lists (e.g. “What lists do I have?”)

If you haven’t used Out of Milk, it’s pretty nifty. It allows you to add items to lists synced with other devices as well as friends or family. And you don’t just have to type or dictate, it can also scan barcodes. So the next time you toss out an empty bottle or box, you can quickly make sure you’ll grab it on your next shopping trip.


Ready to give things a try?

You can download Out of Milk at Google Play and iTunes.

Do you have a favorite App for Grocery Shopping? Tell us about it in the comments below!

Tips & Tricks: These cool tricks will help you up your drag and drop game on iOS 11

Here are some of the cool things you can do with drag and drop in iOS 11.


By Joseph Keller of iMore.com

Drag and drop is one of the marquee features of iOS 11. You can drag photos, documents, and other items from one location on your iPhone to another, whether that’s between apps or within a single app. While you might have a handle on the basics of drag and drop, there are some cool tricks that you could have escaped your notice.

Here are some of the best tricks that drag and drop has up its sleeves:

Drag within apps
Drag multiple items
Move text between apps
Drag contacts and addresses into Maps
Open links in Safari

Drag within apps


While a lot of Apple’s marketing with drag and drop focused on your ability to drag items between apps, you can also move items within an app. So, copy text from one note to another, or drag photos into a new photo album.
One of the great things about this is feature is not strictly confined to the iPad. While you need an iPad to really take advantage of the full range of drag and drop capabilities, apps like Notes and Files let you drag and drop items on your iPhone as well, as long as you stay within that app.

Drag multiple items


You don’t have to drag things one at a time with drag and drop. If you’re moving something like photos or documents, once you start dragging the first one, just tap others with a different finger and they’ll shoot over to your existing dragging activity. This way, you can quickly move a bunch of related documents into a new folder, or drag photos into a brand new album.

This isn’t just for different file types, either. You can also use this trick when you’re rearranging apps on your Home screen. This way, you can drag multiple apps into a new app folder or a different Home screen at once.

Move text between apps

As a writer that likes to work on his iPad and has to use a lot of quotes, I find this next trick particularly useful. If you’ve got text in one app, whether it’s a note you’ve written down or a section of text from an article or document that you want to quote, you can now just drag it between two apps. Just highlight the text you want to move into your app of choice, then drag it from its origin point into your app.

Drag contacts and addresses into Maps

This is a neat little trick that makes getting directions to a new place easier. If you have a contact with an address that you’re unfamiliar with, you can easily find that address and get directions by dragging that contact’s name from your list and dropping it into Maps. The app will shoot right to that address, letting you then ask for directions that you can then share with your iPhone with AirDrop.
You can also do this with addresses that you find in other apps or anywhere on the web. Simply drag the address to Maps, and you’ll see the exact location and have the option of getting directions.

Open links in Safari

If you’re reading an article or email or something else that has interesting-looking links, you can now drag those links into Safari to check them out. Just drag the link into the Safari app, drop it, and Safari will open that link. Note that if it’s just a new tab with nothing in it, you’ll need to drag your link into the address bar towards the top of the screen.

You can also do this within Safari. Just drag your link, open a new tab, and drop the link in the address bar if you want to have that link and your existing content open at the same time.


What cool things have you discovered about iOS 11? Tell us about it on the comments below!

Weekly Round Up 1/19/18


I love my Nook and my iPad for reading, nothing will ever beat the smell of a new book.

How Technology Is (and Isn’t) Changing Our Reading Habits


White Collar Automation for the win!!
7 Technology Trends That Will Dominate 2018


They can’t stop the Government from deporting people who’ve been here for 30 years, but the Tech industry wants to focus on the spouses of the dreamers?
Tech Industry Urges U.S. to Keep Work Permits for H-1B Spouses.


Wait, what?

Microsoft tops Thomson Reuters top 100 global tech leaders list.

They’re gonna cure us of our iPhone addiction too…
‘Time well spent’ is shaping up to be tech’s next big debate.

They can’t agree on a budget and our kids are eating Tide Pods, but yeah, Washington is gonna close the digital divide.
Washington’s next big tech battle: closing the country’s digital divide.

Preach!!
Sundar Pichai Google CEO Sundar Pichai: Digital technology must empower workers, not alienate them.

A nice idea but, I draw the line at having to but my dog an iPhone.
Pet tech can entertain some 4-legged family members.

Weekly Round Up 1/12/18


Again?! Steve Jobs may have been a tyrant when it came to the details but, this sh*t rarely happened on his watch.
Yet another macOS High Sierra bug: Unlock App Store system preferences with any password.


With all the Technology surrounding these guys, you’d think they’d pay better attention to the world around them. I mean, I know they live in a bubble, but c’mon!
Data Sheet—Darkness Hits CES Amid the Tech Backlash.

And my hometown made the list! Charlotte NC for the win!
Tech’s New Hotbeds: Cities With Fastest Growth In STEM Jobs Are Far From Silicon Valley.

Wait, does this mean no more Jitterbug?!
Tech for the elderly is a growing area, but founders should think more about whether their gadget will be used.


I think Steve would be more worried about the lack of leadership in his company right now, actually.

The ‘father of the iPod’ says tech addiction would worry Steve Jobs if he were alive today.


What, bribes don’t work on Congress anymore? Since when?!

Tech executives join more than 100 business leaders calling on Congress to move quickly on DACA.

You know, when I was a kid, I remember my parents writing to Captain Kangaroo and asking him to cut his programming in half so I’d watch less. SMH
Kids and Smartphones: Should Tech Companies or Parents Set the Limits?

How to: Monitor Your iPhone Battery Health from your iPhone


By Jeff Gamet of The Mac Observer

Now that we know Apple controls device performance on older iPhones to avoid battery-related issues, maybe it’s time to pay closer attention to your battery’s health. You can do that easily from your iPhone or your Mac. Read on to learn how.
IPhones with older batteries were shutting off without warning, so Apple addressed the problem by essentially slowing down the processor. The issue was that the occasional peak power spike the processor needed over taxed batteries that couldn’t hold a full charge any longer. By spreading the processor requests over more cycles the battery strain was reduced and the phones stopped randomly shutting off.

If you want to track your battery’s overall health so you know what to expect from your iPhone’s performance you can do that from your phone or your Mac, and it doesn’t have to cost any money.

Checking Your iPhone Battery Health on Your Phone

If you want to monitor your iPhone’s overall battery health from your phone check out Battery Life. The app shows your current charge, wear level, and run time. You can see your charge history, too. If you don’t want to see adds and think additional data in the Today widget and Apple Watch app would be handy, that’s a US$1.99 in-app purchase.


Checking Your iPhone Battery Health on Your Mac

You can monitor your iPhone’s battery health from your Mac with coconutBattery. The app is popular staying on top of your Mac’s battery and it’s also great for seeing how your iPhone and iPad battery is holding up. You’ll need to connect your iPhone to your Mac’s USB port to see your phone’s charge and overall capacity, plus you can see details like model number, serial number, and manufacture date. coconutBattery is free and you can upgrade to coconutBattery Plus with additional device data for $9.95.


Apple isn’t saying what it’s threshold is for reducing performance for weak batteries, but anecdotally it looks like when your battery won’t charge beyond 80% of original capacity you’ll see the change. That number comes from several Reddit users saying that’s when they noticed their iPhone got slower, so if nothing else it’s a nice marker point for watching to see if your performance degrades.

What’s your best practices for monitoring your devices battery life? Tell ua about it in the comments below!


How to: find your purchased apps in iOS 11


By Charlie Sorrel of Cult of Mac

The Purchased tab in the iOS App Store may seem to have disappeared in iOS 11, but don’t worry — it has only moved. And got a little less useful. Whereas in iOS 10 and prior, your previously purchased apps were found in their own dedicated App Store tab (iPad) or above the list of app updates (iPhone), now they’re accessed by tapping the little silhouette of a head in a circle, which indicates your user account.

Previous purchases on iOS

The Purchases/Purchased section of the App Store is useful for several things. It lets you quickly (or not so quickly, depending on how many apps you have bought) scroll through apps you have bought before, and download them. It also gives access to apps that have been discontinued, either pulled from the store by their developer, or banned from the store by Apple. That’s right — even banned apps remain available to you through the Purchased section.

Where are my purchased apps in iOS 11?

To find your previous purchases in iOS 11, open up the App Store as usual, and then tap the little User Account icon at the top right. This is available in all the App Store tabs except the search tab. When tapped, the above popover will open. Tap Purchased and you’ll be taken to the familiar screen letting you vie either your own purchases, or your Family purchases (if Family Sharing is activated).

Here, you can scroll through the list, or — by pulling the list down to reveal the search box — narrow the selection by typing.

One thing you won’t find, on the iPad at least, is a list of iPhone-only apps. If you have some old iPhone app that you want to use pixel-doubled on the iPad, you’re out of luck. Even if you know the app you’re looking for, and search on its name, you won’t find it. I tried to find the iPhone-only Instagram, and it doesn’t show up in my purchased list. If I search the App Store for Instagram, though, then I can find it. This may indicate that the App Store isn’t finished in the current iOS 11 beta, and that iPhone/iPad filters will be added in future.

Hiding a purchased app in iOS 11

If you’ve been buying those apps that let you lock away “private” photos behind a passcode, and you don’t want anyone else to know about it, then you can still hide it, exactly like you can on iOS 10 right now. Just swipe left on the app in question, and then tap the bright-red Hide button that shows up. You’re done. Nobody need know your filthy secret.

The current lack of iPhone-only apps is a head-scratcher, but other than that the whole functionality of the old Purchases tab is still there in iOS 11. And its new location is probably better, because dedicating a whole tab to purchases seemed crazy. Now its old tab has been given to games instead, which is great news for everyone: Game lovers can get their fix undiluted by regular apps, and game haters can avoid them entirely. The relocation of purchases, then, is just another part of the greatly improved App Store in iOS 11.

What features of iOS 11 are you looking forward to? Tell us about it in the comments below!!

App of the Week: iOS 11 Preview


By Dave Smith of Business Insider

13 things everyone is going to love about iOS 11

Apple’s newest operating system for iPhones and iPads, iOS 11, finally launches this month. We’ll learn the official release date for iOS 11 at Apple’s big event on September 12; Apple calls its newest iOS “a giant step for iPhone” and “a monumental leap for iPad.”

Here are 13 things everyone will love in the next big iPhone and iPad update:

1. Live Photos will be much better.

Now you can make your live photos into GIFs, which you can make bounce back and forth. Also, you can finally choose which still frame of the Live Photo is the main image, making it easier to find the perfect moment to share on social media.

2. You’ll be able to store way more photos and videos on your phone.

Apple is changing the compression formats in iOS 11, which will allow you to store more photos and videos on your phone. Apple says you’ll be able to save twice as many photos and videos on your device than in iOS 10.

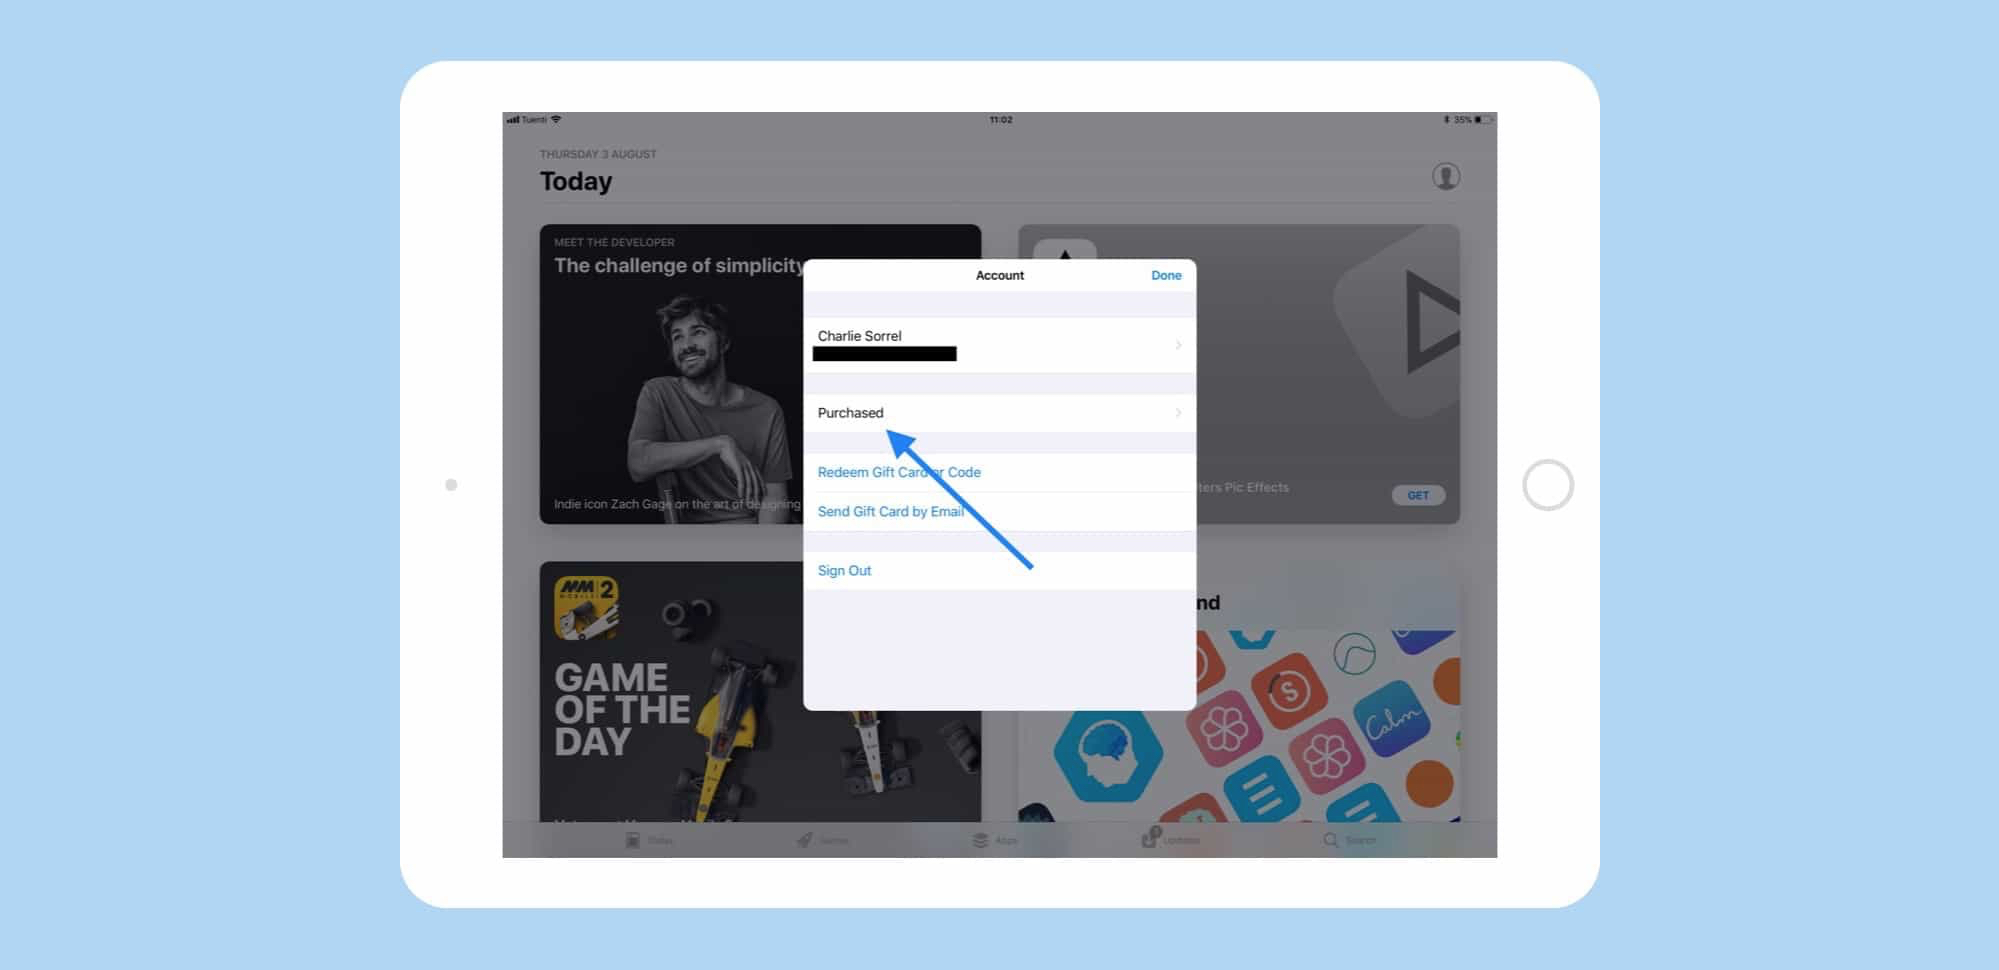
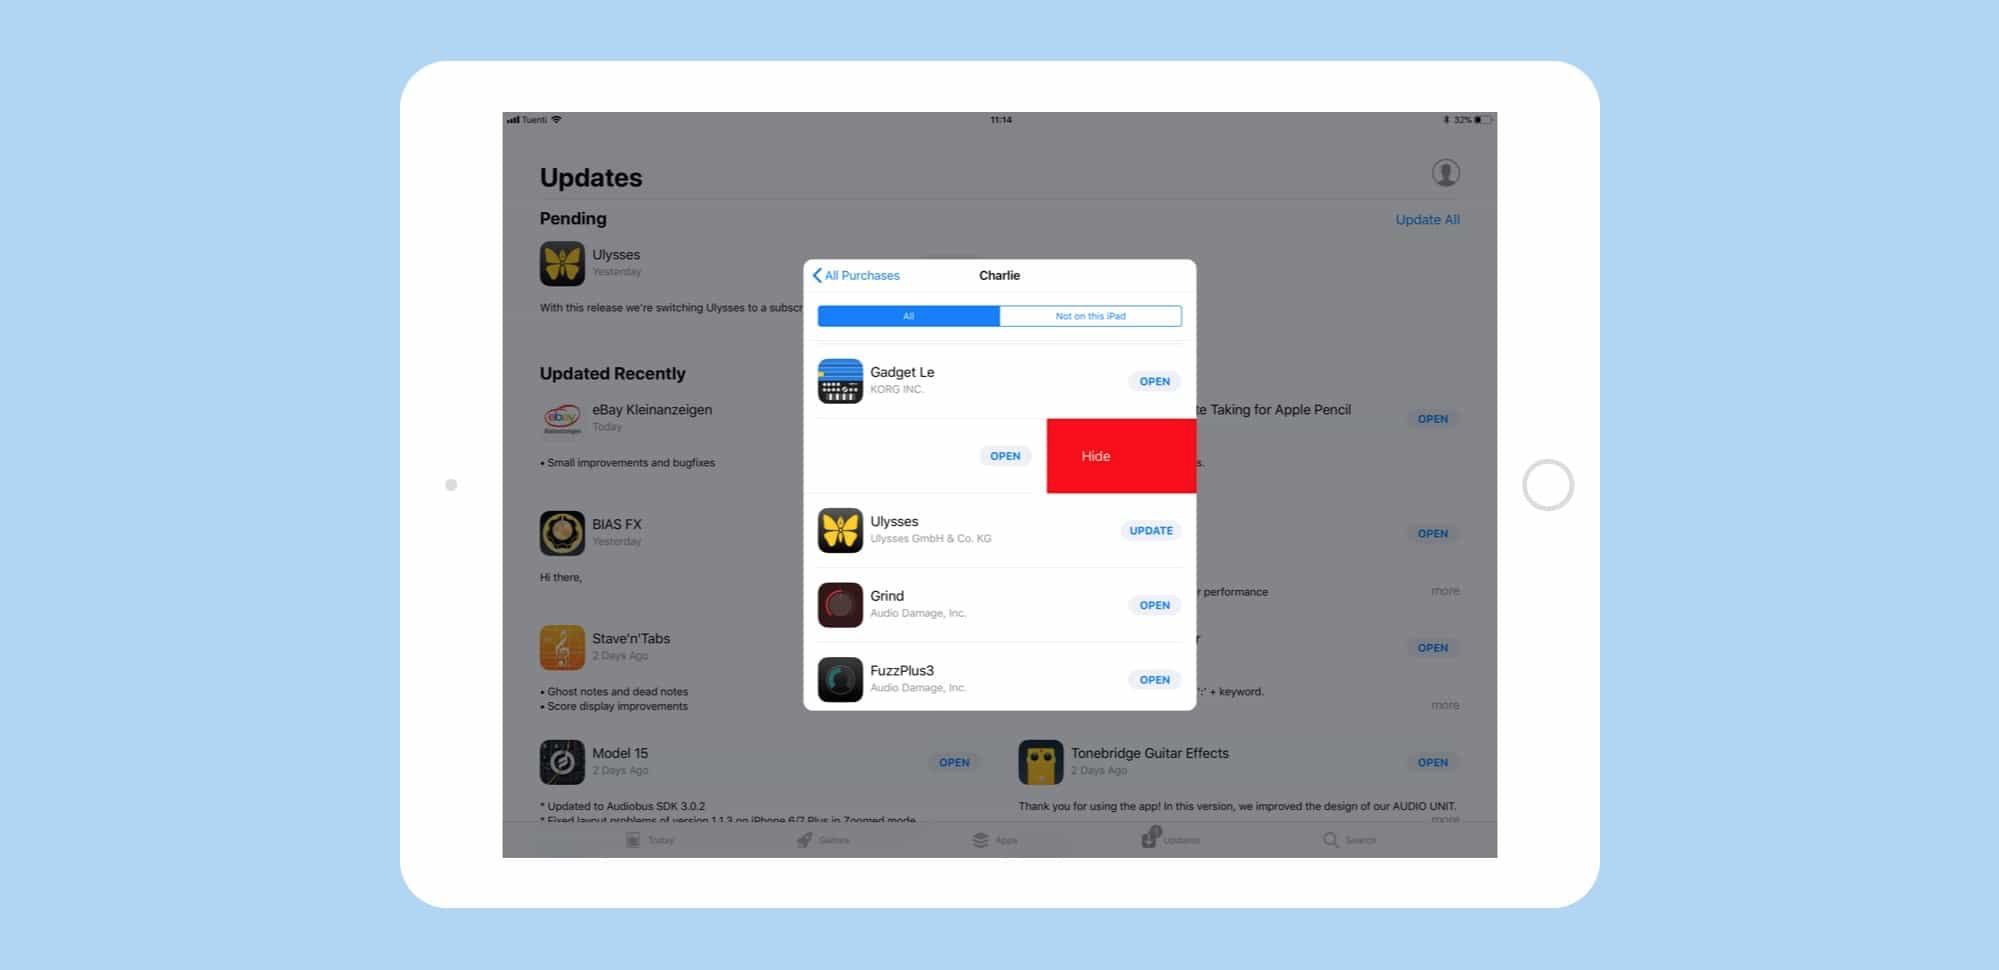
3. The App Store is getting a much-needed face-lift.

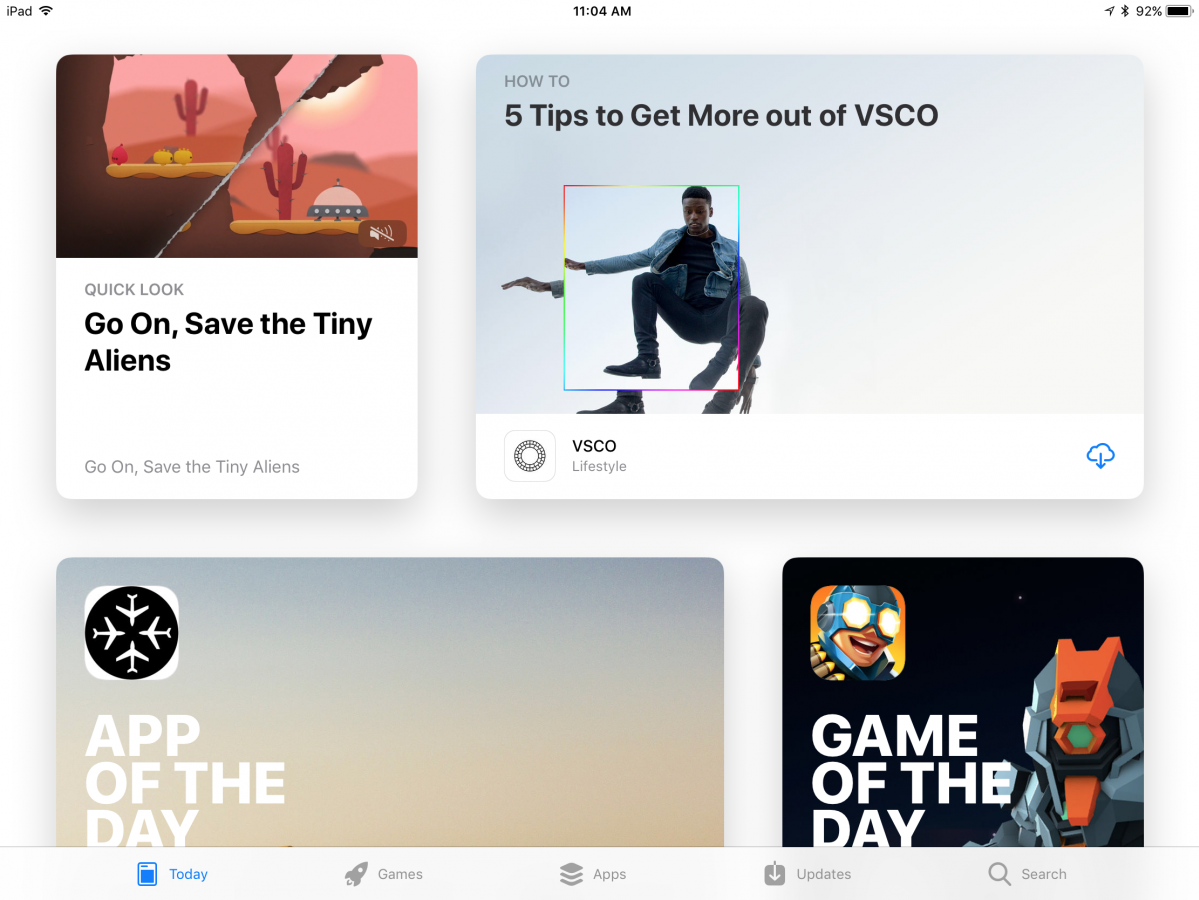
Apple is finally bringing the design language it established for newer apps like Music and News to the App Store itself.

Not only did Apple make the App Store look cleaner, with better, bolder text, it also changed its organization. Now everyone will have a personalized “Today” tab to highlight unique apps and games.

And speaking of games, Apple has finally dedicated a full tab of the App Store to games, making new or notable ones much easier to find.

4. The Messages app is getting cleaned up.

It felt like mayhem when Apple added the app drawer to its Messages app. Suddenly, you could add stickers and GIFs and all sorts of buttons and visuals to your messages, but all the new options weren’t easy to find and were somewhat overwhelming. Apple redesigned the app drawer in Messages for iOS 11, making it much easier to browse all the various stickers and emojis at your disposal.

5. Siri sounds more natural and can translate for you.

Apple says Siri is going to get much more advanced through machine learning and artificial intelligence — it’s unclear whether these changes would make Siri better to use, but at the very least, Apple has made Siri sound a bit less robotic and more natural, a bit like Amazon’s Alexa assistant.

And Apple is also testing a cool translation feature for Siri, where if you ask the assistant to say a certain phrase in a different language, like Chinese or Italian, it will speak on your behalf in the desired language.

6. The iPhone keyboard is getting smarter.

A signature feature of Google Now is finally coming to the iOS ecosystem: When you type in iOS 11, the keyboard will suggest words you may have recently viewed on your phone — from your Messages app, for example, or Safari. So when your friend texts you the name of a restaurant, it may be one of the first suggestions when you start searching for that restaurant on the web.

Also, you’ll be able to use the keyboard with one hand — just hold the emoji key and select one-handed typing to move all the keys closer to your thumb.

7. Apple is finally letting you manage your Control Center.

The Control Center was perhaps the most useful feature of iOS 7, released in 2013. By swiping up from the bottom of your screen, you could access a variety of shortcuts and buttons. Four years later, you’ll finally be able to choose what those shortcuts and buttons are.

8. Notifications are getting simplified.

In iOS 11, all your notifications — both recent and missed — are in one place, with no separate tabs. Just pull down from the top of the screen to see everything at once.

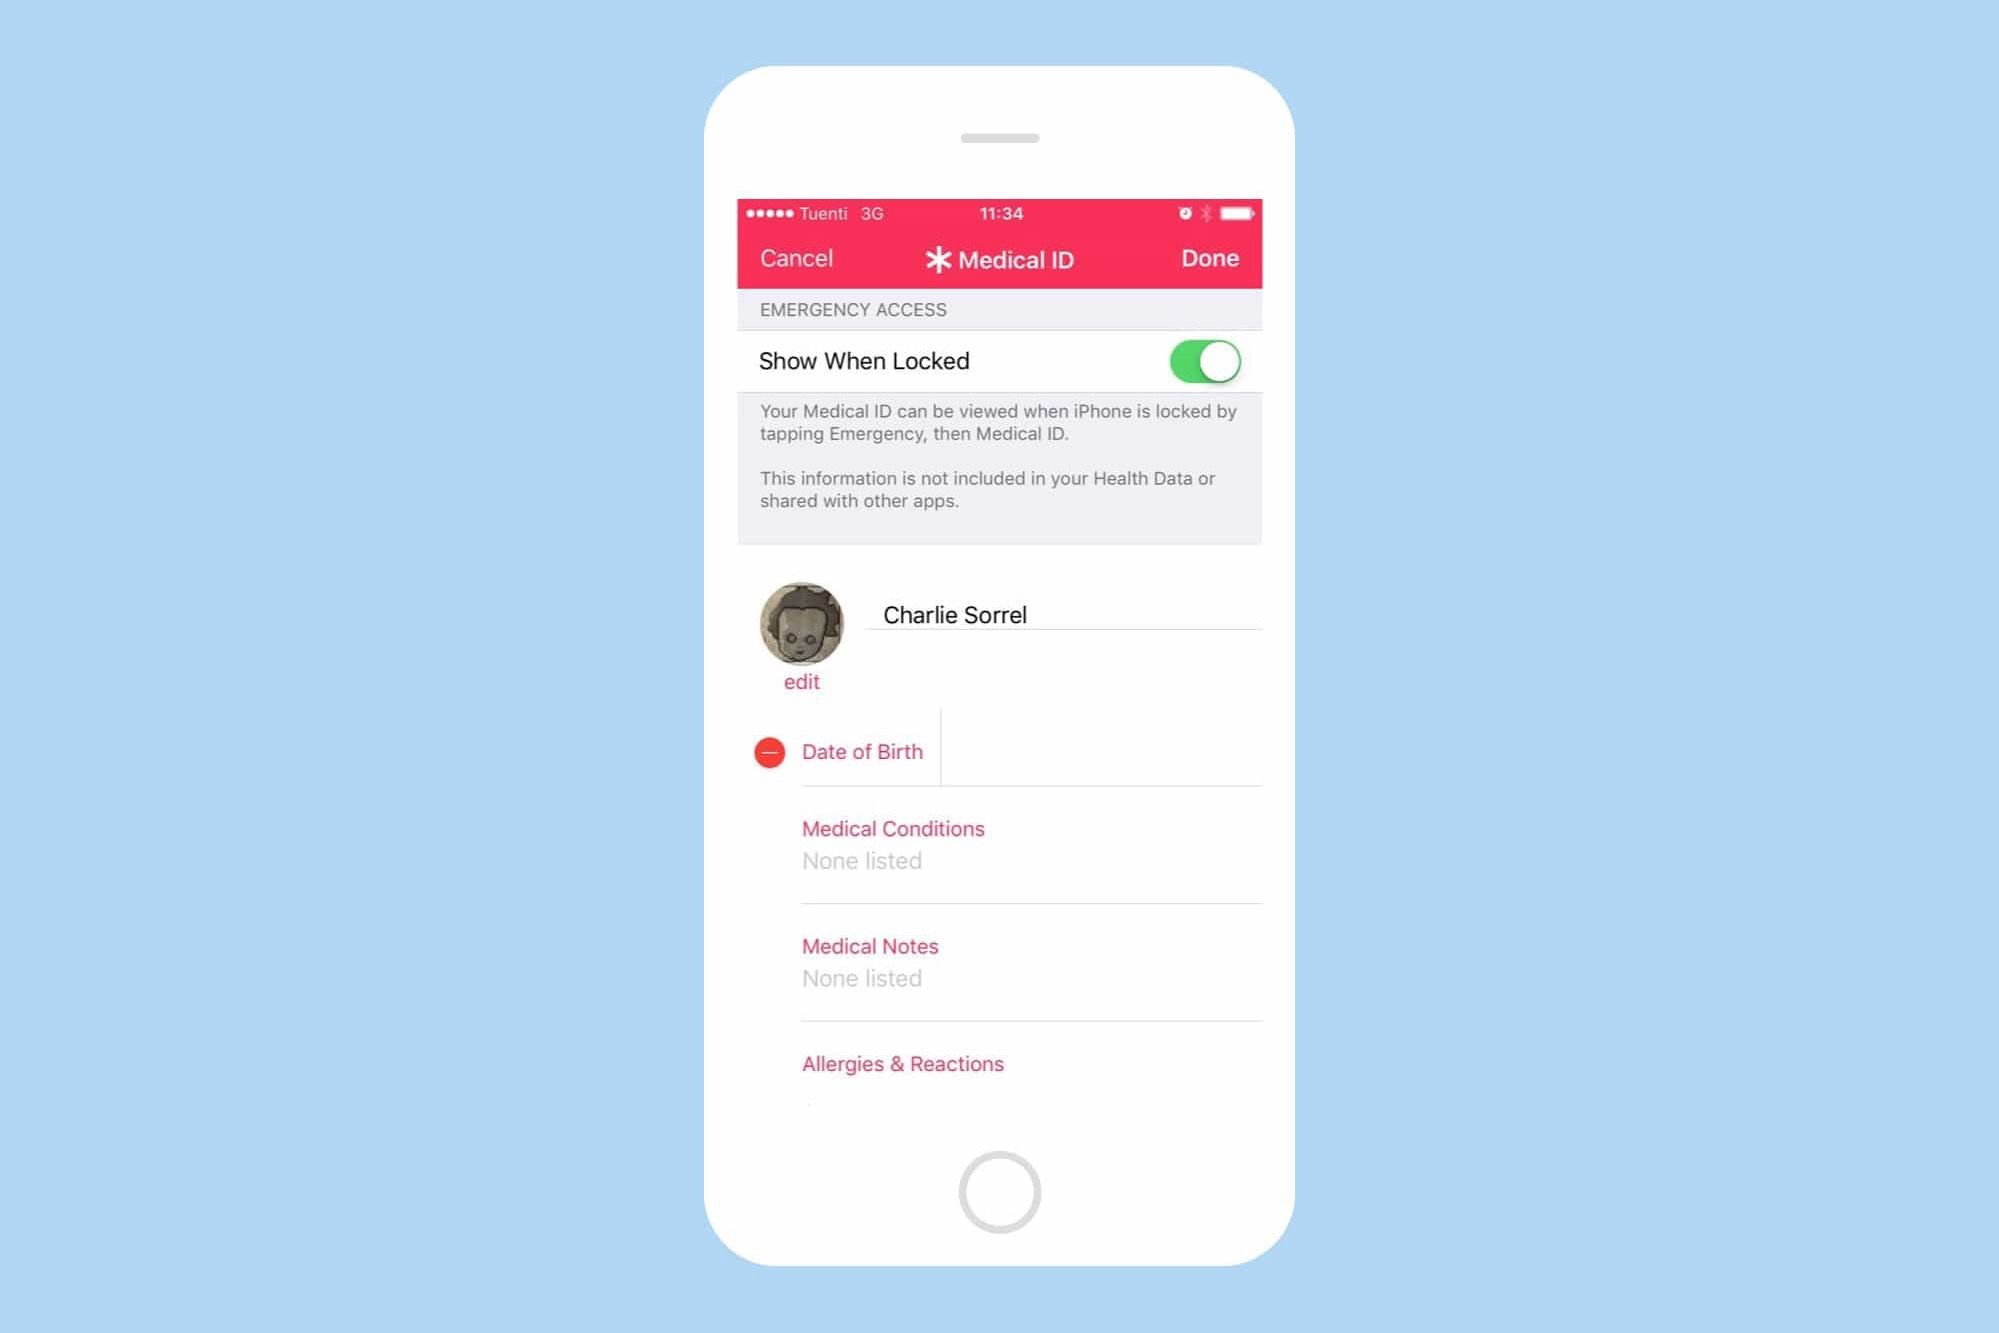
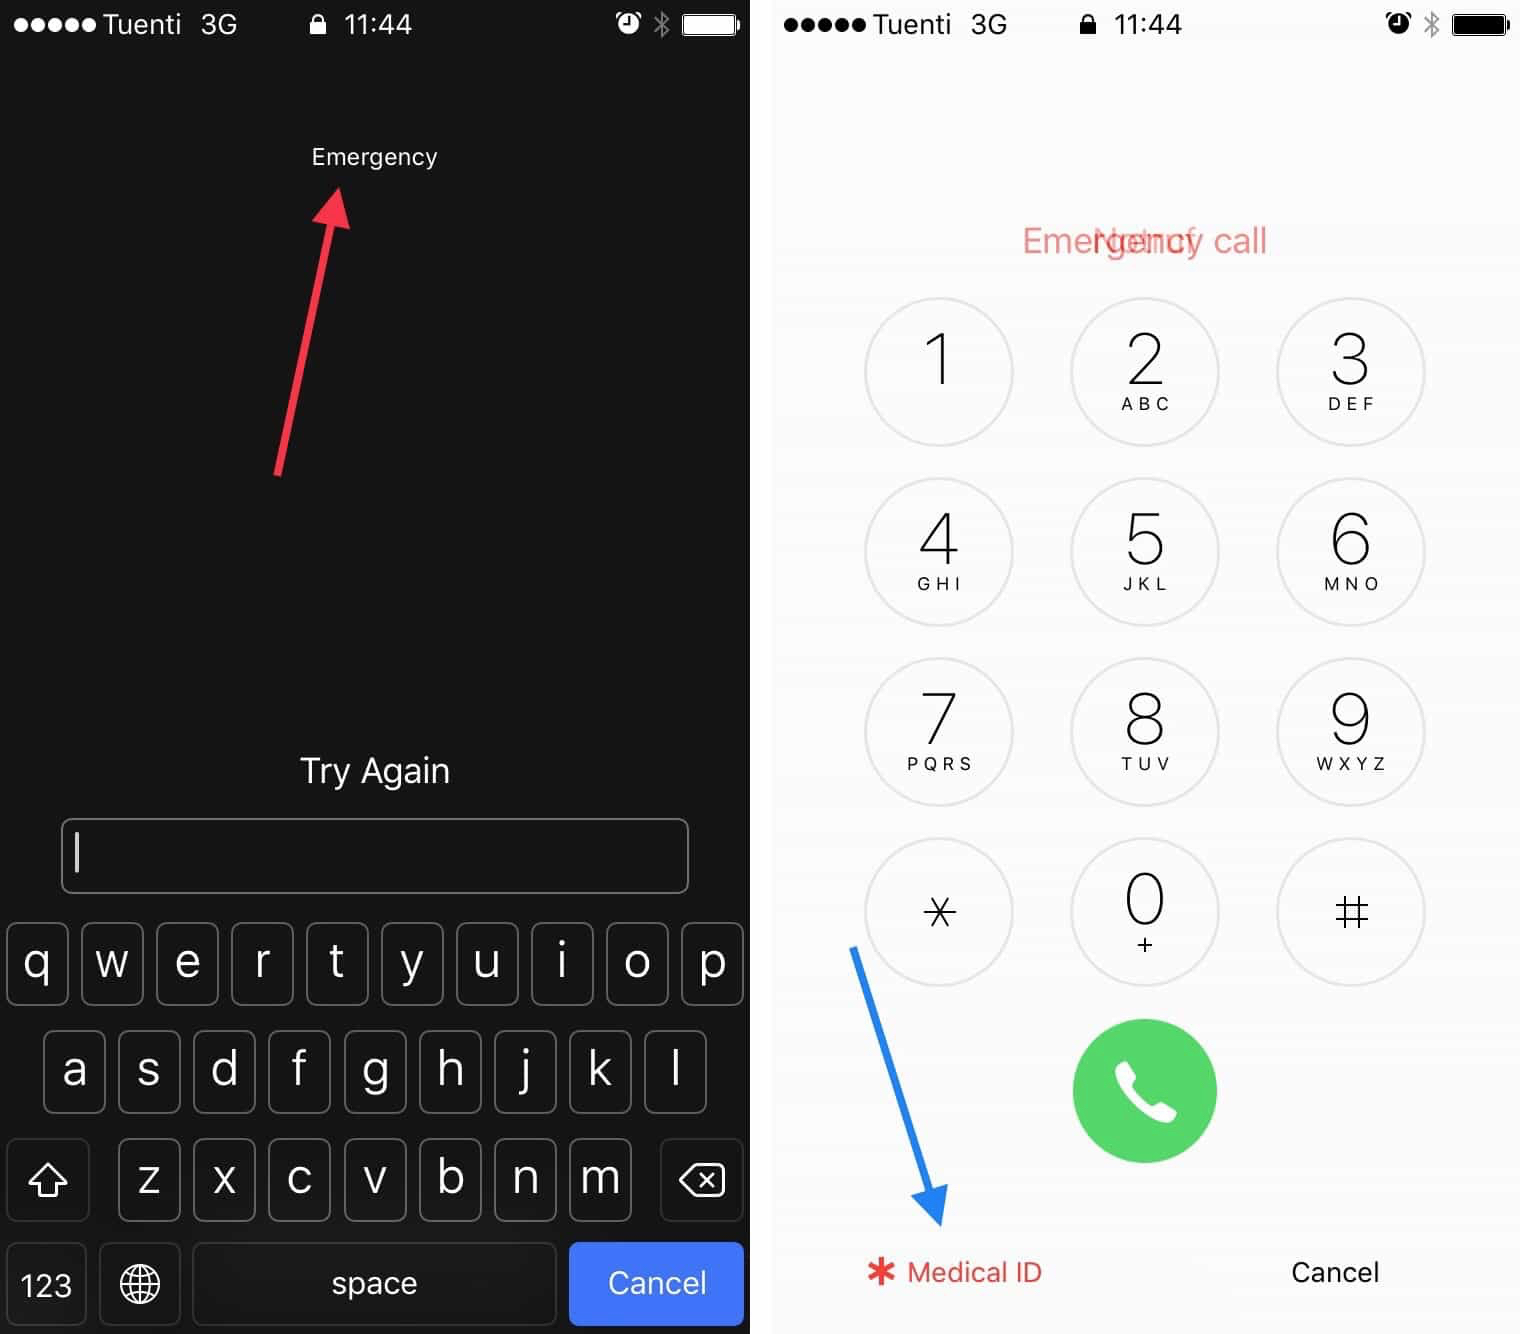
9. There’s a new feature that could actually save your life.

Distracted driving is a real, deadly problem. Apple has added a clever feature that triggers Do Not Disturb mode when the iPhone is in the car to hide notifications for texts, calls, and other apps while you’re driving. The feature can even notify people that you’re driving and will contact them soon.

10. Apple Maps are better, indoors and out.

Apple is adding indoor maps for hundreds of airports and shopping centers around the world, making it much easier to navigate your local mall.
And speaking of navigation, Apple has finally added lane guidance to Apple Maps for more precise turn-by-turn directions.

11. Setting up a new iPhone or iPad is much easier.

If you just bought a new iPhone or iPad, you can hold it close to an iOS device you already own to magically import all your settings, preferences and iCloud Keychain passwords. It helps you start using that brand-new device much more quickly than before.

12. The volume box is moving out of your way.

When you change the volume on your iPhone or iPad, a translucent box pops up in the middle of the screen. It’s a bit annoying, so Apple is redesigning the volume box in iOS

Here’s how it’ll look:


13. You can instantly share Wi-Fi passwords.

Soon, you’ll no longer need to save your Wi-Fi password on a wrinkled piece of paper in a drawer somewhere. In iOS 11, if you need a Wi-Fi password for a given network, just find someone who is already using it and hold your device near theirs to transfer the password instantly.


What new feature are you looking forward to the most in iOS 11? Tell us about it in the comments below!

App of the Week: Dayone: Superb journal app trades simplicity for sophistication

The new version loses some of its predecessor’s gorgeous simplicity, but compensates with powerful and useful new features.


By Nathan Alderman of MacWorld

It’s hard to improve upon perfection. The original Day One made keeping a journal on your Mac easy and fun. Day One 2 wants to do even more, but to fulfill those ambitions, it’s partly sacrificed the original’s beautifully simple design.


What’s changed, and what hasn’t

It’s still a snap to start typing a new entry in Day One 2, either from the app itself or its convenient menu bar widget. The latter also provides customizable reminders to write down your thoughts at a given time. Day One 2 tags entries with the date, time, any custom tags you care to create, the current weather, and your GPS-based location.

Don’t want your journal knowing too much about you? You can deactivate location info when crafting a new entry.

Don’t want anyone else reading your journal? A password-lock feature will keep it safe from prying eyes.

Day One 2 adds the ability to keep up to ten separate, color-coded journals at once; for example one to serve as your personal diary, another for business notes, and a third to jot down ideas for that novel you’ve been planning. And where its predecessor only allowed a single photo per entry, Day One 2 supports up to ten, dragged and dropped from Photos, Safari, or the Finder. Paste in a YouTube or Vimeo URL to embed that video in your finished entry, as well.

The Mac version adds a Photos view (previously an iOS-only feature) to the existing Map, Timeline, and Calendar views, and now lets you edit multiple entries at once. You can also view and search by additional information gathered by Day One 2’s iOS versions, including motion and step data and the songs you had playing while you composed a given entry. (The Mac app doesn’t include these features, which at least partly makes sense, unless you frequently take long hikes while typing on your laptop.)

To accommodate these new features, Day One 2 sprawls across greater screen space, stuffed with more, smaller icons. While Bloom Built has clearly worked to keep the interface clean and appealing, it’s definitely more cluttered than its predecessor’s. Figuring out each of the many new buttons remains fairly easy, but still not as easy as in the old version. Editing multiple entries particularly threw me, until I spotted a series of related icons that quietly showed up in an unexpected corner of the window.


That syncing feeling

Version 1 relied on Dropbox or iCloud to sync journal entries across its Mac and iOS iterations, but version 2 uses Day One Sync, Bloom Built’s own free, proprietary system. This has alarmed some iCloud-loving users, but Bloom Built argues that the new service works better, faster, and more securely than either of the old solutions.
I had trouble getting Dropbox to work with the original Day One, but I have no such complaints about Day One Sync. Setting up an account took mere minutes, and synching entries between my Mac and iPad happened almost instantly. Though any data you sync via Day One’s system is already securely encrypted, Bloom Built says it’s planning to add even stronger private key encryption in the months ahead.

Day One 2 also temporarily lacks its predecessor’s Publish feature, which automatically turned entries into blog pages, although Bloom Built says it’s rethinking that ability, and will add it in a future update. I can see how Day One 2 might evolve into a powerful online publishing platform, especially if its makers keep their other on-the-horizon promises of stronger social media integration and the ability to turn your journal entries into a printed book.


Bottom line

In my tests, Day One 2 offered speedy searching, excellent online help files, and responsive, bug-free performance. It’s become slightly more complicated than its predecessor and it costs four times as much. But this superb journaling app remains pleasant to behold, easy to use, and a tough act for any rival to follow.

Download DayOne for iOS here.
Download DayOne for Mac OS here.


App of the Week: Trusted Contacts


Google brings it’s emergency location tracking app to iOS.


By Brett Williams of Mashable

Smartphones allow us to stay in contact with our loved ones more closely than ever before, but some of the most important features, like location sharing, are only functional when everyone uses the same operating system on their devices.

That’s about to change. Google is bringing its Trusted Contacts location sharing app to iOS, making it even easier for families that span the Android-iPhone divide to keep track of each other during emergencies.

The app comes to iOS after debuting for Android last year. Users can now proactively share their location with their in-group or search for the last place a friend or loved one was active on their phone if they suddenly go silent, no matter their OS.

iOS devices already have a similar feature with Find My Friends, but Trusted Contacts expands the scope of the tracking abilities across operating systems. That means a loved one with an iPhone can pinpoint the last active location of a Samsung Galaxy S8, for example, and vice versa.

The new iOS Trusted Contacts app comes with a round of updates for the service for all users. You can now add people to your “trusted contacts” list by their phone number, and the app sends an SMS to them to connect.

Users can also choose how quickly their location will be automatically shared if they know they’ll be away from their phone and unable to answer. The default setting had been five minutes, but now the response time can be set at any time from immediately to an hour.

Privacy might be a concern for people who don’t want their loved ones to have a constant bead on their location — but if it’s that big of a deal, those people don’t have to download the app. Google told Mashable last year at the launch of the Android version that Trusted Contacts is “necessary” no matter the privacy concerns, since emergency situations can make it impossible for people to respond to messages.

The Trusted Contacts expansion follows Google’s new SOS alerts, a set of features for Search and Maps designed to make emergency information more accessible to all in the event of a crisis. Google might not be able to prevent disasters, but it’s taking steps to help those affected.

What steps have you taken on your phone to ensure your family can reach you in an emergency? Tell us about it in the comments below!

Tips & Tricks: How To Set Up Your Medical ID On Your iPhone


By Charlie Sorrel of Cult of Mac

Inside the iPhone’s Health App, the app that counts your steps and hooks up with other apps to monitor your activity and health, lives your Medical ID. This is a page containing everything important that you might want a doctor or first responder to know in an emergency, and is accessible from your iPhone’s lock screen without a password.

By default, the app only contains your name, and a few details automatically culled from your address book, but fleshing it out is quick and easy. Here’s how to set up your Medical ID with any and all the information you want to make available.

How to Edit your iPhone Medical ID

Inside the iPhone’s Health App, the app that counts your steps and hooks up with other apps to monitor your activity and health, lives your Medical ID. This is a page containing everything important that you might want a doctor or first responder to know in an emergency, and is accessible from your iPhone’s lock screen without a password.

By default, the app only contains your name, and a few details automatically culled from your address book, but fleshing it out is quick and easy. Here’s how to set up your Medical ID with any and all the information you want to make available.

Even if you don’t have a medical condition, you might like to have the contact details of your next-of-kin in your Medical ID, just so they can be informed if/when the worst happens.

To add information to your Medical ID, the easiest option is to open up the Health app and tap the Medical ID tab at the bottom right. Then tap Edit to see all the options. You can enter any medications you take, list allergies, add medical conditions, and input your weight and height (perhaps already entered from other Health app info), along with a list of emergency contacts, blood type, and organ donor information. As you can see, there’s a lot of info that you might want to give to emergency personnel even if you don’t have a specific condition or allergy.

Accessing your Medical ID in an emergency


All first responders know what a Medical alert pedant looks like, but perhaps not all of them know how to get the information out of your iPhone. Luckily, the iPhone is the most popular phone in the world, so that makes it fairly familiar to anyone. And getting to the info is easy — for other people anyway.

The Medical ID is accessed from the iPhone’s lock screen. When the passcode entry panel comes up, you can tap the word Emergency to get to a phone keypad. Below that keypad is the button for your Medical ID. If you try this on somebody else’s phone, it’s easy. On your own iPhone it’s almost impossible, because Touch ID unlocks your iPhone before you can get to it.

It only takes a few minutes to set up your Medical ID, and then you can forget about it.
So why not do it right now?